And while a squeegee goes a long way for keeping your shower doors clean, hard water buildup happens to the best of us. Dulude recommends Soft Scrub to deep-clean the shower door, or a hard water stain remover like Bio Clean.
Spring-cleaning tips for your living room
The phrase “where the sun don’t shine” can certainly apply to that neglected space under the couch, also known as no-man’s-land for missing, well, everything. Take the time to roll back heavy furniture and clean under there even if no one’s going to see it. Dulude says to give the same treatment to the floor under rugs. Roll them up and mop, and “be sure to let the floor dry before putting the rugs back,” she adds.
12. Reach high with a microfiber cloth
On the opposite end of the spectrum, it’s also important to reach up and clean dust and cobwebs on top of things in your living area—especially ceiling fans that can circulate the dust every time you turn it on. When dealing with hard-to-reach areas, Harasim suggests using a cleaning product with a long stem like a Swiffer, or a microfiber cloth and soapy water (if you can get up there on a step ladder).
Spring-cleaning tips for closets
Once you’re done decluttering your closet, make sure it stays organized and fresh—even with a stinky laundry basket. “I like to use these cedar hang-ups to bring fresh wood scent to the closet while also repelling moths and mice,” Dulude says. Harasim suggests leaving out Arm & Hammer baking soda packs (which even come as air filters), or a fragrant bar of soap like Irish Spring to keep things smelling better. Both experts suggest tackling odors with white vinegar, too, either while cleaning or spraying it in the air. “Yes, it will smell strongly like vinegar at first but once that smell goes, the other odors will as well,” Dulude says.
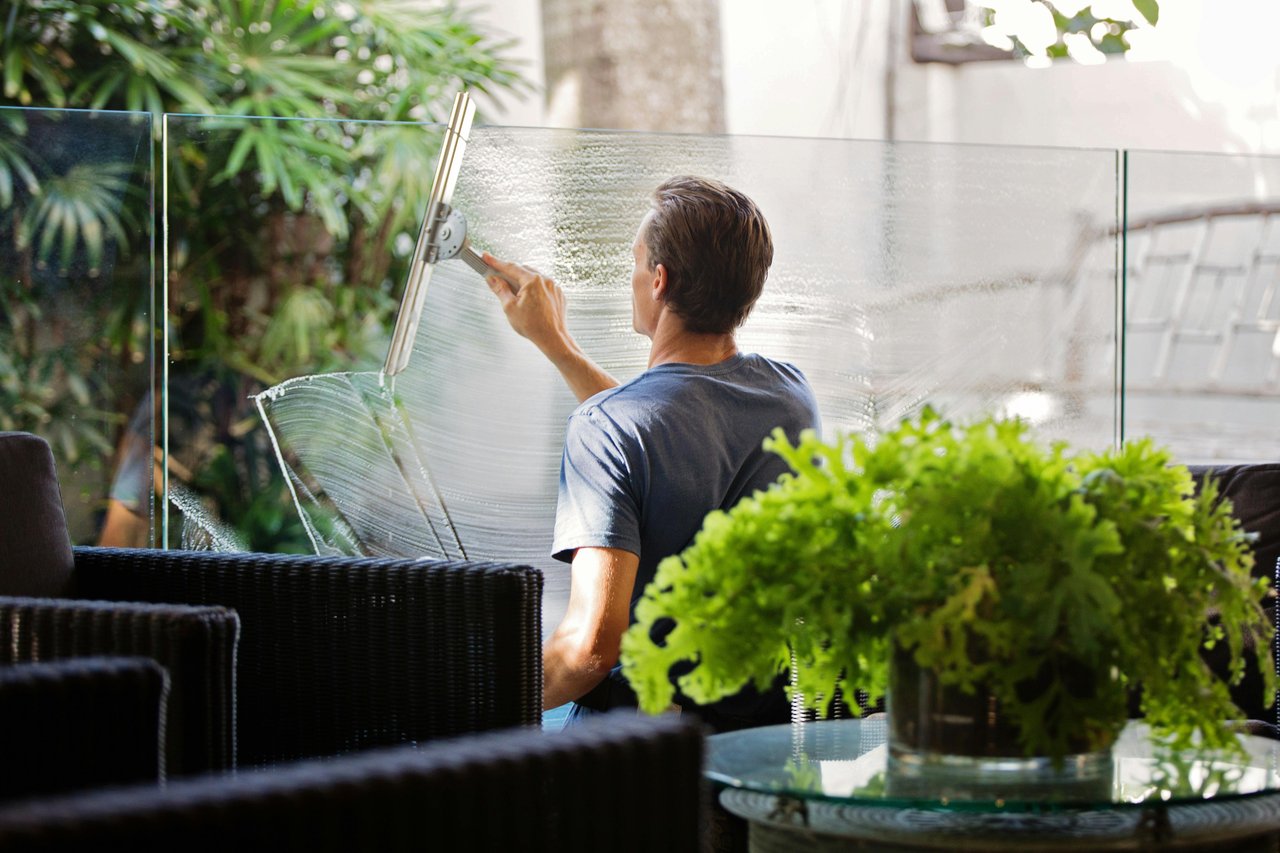
Spring-cleaning tips for windows
Windows are always a tricky place to clean, especially if they are high up. Start by steam cleaning the frame of the window, then wipe away the grime with a microfiber cloth. You’ll be surprised how much dust gets in. To make your windows sparkle, make sure there are no smudges obscuring the spring sunlight. You’ll want to use a glass cleaner on both sides of the window.
“It takes no time to quickly dry-dust the blinds each week with a duster, but if that has not been done in a long time then a detailed cleaning might be needed,” Dulude says. Generally, both experts recommend being extra careful with blinds (following manufacturer directions, e.g. and not tugging or pulling when dusting). Dulude recommends spraying all-purpose cleaner directly on the blind and wiping each slat individually. For a deep-clean, you may need to take the blinds off the window, soak them in a tub with warm water and soap, then gently scrub before rinsing, drying, and refitting them to your clean windows.
What month should you start spring-cleaning?
While there’s no specific start date to stick to when spring-cleaning, there is a detail to keep in mind for when the time is “right.” Mary Gagliardi, a cleaning expert who holds the official title of Dr. Laundry at Clorox, says that it’s whenever you can comfortably keep your windows open for fresh air during much-needed ventilation—like if you’re using bleach. “For other tasks, you don’t need to wait until mid-March; you can start them anytime,” she says.
To keep from becoming overwhelmed, though, plan to start your checklist close to the beginning of spring and give yourself as many weekends as needed to get through it before you’re back on any sort of regular hosting duty for the season. “It’s not mandatory that you must clean your entire home in one day,” Gagliardi says. “It can be helpful to tackle these deep-cleaning tasks a few rooms at a time.”
What’s the best way to start your spring-cleaning?
There’s no time like the present! If you’ve been procrastinating over a certain large task for weeks—like cleaning all windows—start with that one. But if you’re having a hard time getting going, Gagliardi suggests starting with whatever feels most manageable in order to ease into your spring-cleaning checklist. “For people who really don’t like home cleaning, it helps to pick a room they can easily tackle and start there,” she says. “Quick success in one room can motivate them to keep going and complete another.”
Day suggests setting yourself up for cleaning success with prep work. “The best way to get started is by gathering all your cleaning supplies and tools beforehand,” she says. “This way, you’re ready to tackle the job without interruptions.” Now is the time to declutter as well, which can be its own task on your spring-cleaning checklist. Go room by room and decide which furnishings or accessories can be donated or trashed so that your space can be as neat as it is clean. (In the bathroom, this can be the perfect time to pare down and reorganize your medicine cabinet too.)
Lastly, give yourself some entertainment during the work, so that you’re more likely to stick with it until it’s finished. “I personally love putting on music, a podcast, or an audiobook in the background to stay focused,” Day notes.
What’s the “20-minute rule” in cleaning?
Cleaning a room in a set amount of time can hold you accountable, but the time limit also depends on the size of the space and how cluttered it was to begin with. Either way, setting a 20-minute timer while you tidy up could help you keep an organized room clean quickly. “I do a daily 20 minute clean of various spaces,” says Ashley Dixon, home content creator. “I set my timer for 20 minutes and do as much as I can in those 20 minutes, whichever space needs my attention most.” You could use this time to throw a duvet, linens, or bath mats in the wash as you deep-clean windows in one room, for instance.
Gagliardi would maximize her 20 minutes by disinfecting what she refers to as “high traffic and high touch areas,” like countertops and doorknobs. “Use a multipurpose spray so you don’t have to worry about switching between multiple products as you go.”
Top spring-cleaning tips to remember:
The start of spring is an opportunity to refresh every corner of your home, but remember to focus on these three cleaning tasks as you work:
Take note of neglected areas
Some areas in your home can collect dust and dirt from months of flying under the radar, so now is a good time to pay attention to them. “Think of baseboards, under furniture, behind appliances, and surfaces you might not see, [such as] the tops of fans, headboards, shelving, and door frames,” Day says. Other spots to bear in mind? Mildew on a shower curtain, oil buildup on a stovetop, hard water stains on a shower head, yellow grout on a vanity, and even a smelly garbage disposal. Put them on the list!
Always clean a room from top to bottom—literally
“This means to dust corners of the ceiling as well as high shelves and picture frames first, working your way down to progressively lower surfaces as you go, ending with vacuuming or cleaning the floor,” Gagliardi says. “This way you don’t have to reclean a surface, like a tabletop that picks up dust from a ceiling fan that is cleaned after the tabletop.” The same goes for clearing cobwebs from high corners before mopping, and detailing light fixtures before carpets.
Read labels
Before you use a tool or product, read the label. It’s also a good time to note the expiration dates of what’s in your collection. “Bleach-based products expire after one year because the sodium hypochlorite active naturally breaks down into salt and water over time,” Gagliardi says. “Out-of-date bleach won’t perform as promised, so make sure you are using a bottle purchased within the last year.”
What products do I need to complete my spring-cleaning checklist?
Dixon says that one mistake to avoid is buying too many products for the project of spring-cleaning. “You don’t need a ton for an effective clean,” she says. “I have a set of products and tools I can use in various spaces.” What’s in her arsenal? An O-Cedar Clean spin mop (which can be used on floors, baseboards, and kitchen cabinets), an all-purpose cleaner, a vacuum, a toilet bowl cleaner, a glass cleaner, wood cleaner, baking soda, vinegar, sponges, and microfiber cloths.
Day agrees that you should be strategic about what ends up in your cleaning caddy by making any product purchases as multipurpose as possible. “For example, Clorox Disinfecting Bleach is a versatile cleaning and disinfecting agent with hundreds of uses,” she says. “On top of using it in laundry rooms to keep your clothes and linens whiter longer, you can use bleach to clean and disinfect numerous hard, nonporous surfaces throughout your home; mop floors; disinfect and eliminate odor from trash can; and refresh old plastic shower curtains and liners.”
When it comes to cleaning accessories, Gagliardi suggests a long-handled microfiber duster, a broom with a dustpan, a bucket, an upholstery steam cleaner (which can be rented), a nylon brush, and gloves. These items can help you get rid of grime without having an overstuffed cleaning collection.